Table of Contents
Support Guide
Prioritization Rules in Shape Software
-
Shape Software

Prioritized Views in Shape
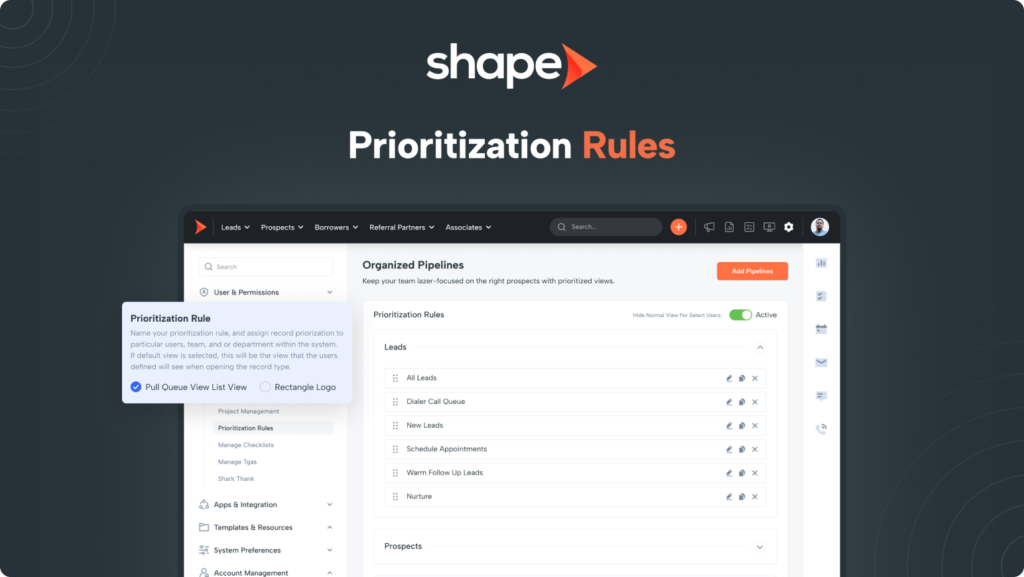
In Shape, most users will work off of pre-defined Prioritization Rules for enhanced organization and efficiency. Your CRM will come with pre-set lists based on best practices in your industry but you can create new lists that are as simple as keeping records in one place based on status, or, as complex as only including records that were created within the last 30 days with no call made in 8 hours!
1.
Go to Settings > Prioritization Rules
You will want to navigate to Settings in the top navigation bar and select “Prioritization Rules” under “Custom Configuration” on the left-hand side.
Prioritization Rules: https://secure.setshape.com/lead-prioritizationv2
2.
Use the toggle at the top of the page to hide the Normal View from your users
On this settings main page, you will see a toggle to hide the Normal View aka the Database View from your users to streamline the list options for your users.
3.
Create a new list by selecting "Add New Pipeline"
You will notice an orange button to add a new prioritized list into your system in the top right. Alternatively, you can edit, duplicate, and delete existing rules using the buttons on the right side of the pre-existing lists.
4.
Name your new list and adjust visibility
The name of the list is what will appear in the dropdown off of the navigation bar and the record type is which record type the list applies to.
The users, teams, and departments dropdowns allow you to select which users, teams or departments have access to viewing the list. If no one is selected here, no one will see this list.
5.
Add, edit, re-organize, and delete!
Click the “Add Rule” button to add a rule into your new prioritized view. This will tell Shape what records should show under your new list.
Once added, you can name the rule as well as add any included/excluded statuses, marketing sources, tags and milestones.
You can click and drag your rules to order them as needed as well as using the buttons on the right to edit and delete your rules if needed.
6.
Add any Field Filter Rules to narrow down the list further.
Utilize the field filter rules to narrow down your prioritized view. Be mindful of your rules and how they relate to one another because it is possible for a record to show up in two of the sections within the same list. It is recommended to start out by just using status filters and add additional filters slowly to ensure the rules are pulling the correct contacts.
Prioritized lists are a series of filters. When you pull a list, the system looks for and then returns data. Each record must get evaluated against each filter, filters with complex logic can increase load times. If a list is running slowly, it’s because parts of the list take a long time to find and return the filtered data or you are pulling a lot of records. Try simplifying your filters and/or removing unused sections.
Frequently asked questions
Will there be automated actions that occur if I just set up my prioritized list?
No, prioritization rules are just for organization. If you would like to have automated actions and communications off of certain events, set these up in triggers or drip campaigns.
My prioritized list loads slower, why is that?
Prioritized lists are a series of filters. When you pull a list, the system looks for and then returns data. Each record must get evaluated against each filter, filters with complex logic can increase load times. If a list is running slowly, it’s because parts of the list take a long time to find and return the filtered data or you are pulling a lot of records. Try simplifying your filters and/or removing unused sections.
Can I change the order of my prioritized views in the dropdown?
Absolutely! Simply click and drag the views to re-order them however you wish. You can also reorder the rules within that view (blue bar containing the name on your list view) using the same method.
Keywords: prioritization, prioritized rules, filed filters, rule settings, status, list view, leads, prospects, borrowers, referral partners, associates, blue bar, pipeline, bucket

