Table of Contents
Support Guide
Email & Calendar Integration
-
Shape Software

Connecting Google Calendar or Outlook Calendar to Shape
Elevate your workflow with seamless integration of your Gmail (Google Workspace) or Outlook email and calendar into Shape Software CRM. This integration enables you to synchronize calendar events and consolidate all your important information within a single, user-friendly platform.
This guide also includes step-by-step instructions on how to set up email forwarding, allowing you to conveniently receive incoming emails directly into your Shape Software system.
Outgoing emails in Shape Software CRM do not rely on a direct connection. Instead, they are sent through compliant servers, offering protection for your email domain, enhanced tracking capabilities, and compliance with opt-out requirements. This enables Shape to effectively track the performance of your emails, including successful deliveries, clicks, opens, and bounce rates.
Connecting your email calendar
1. Navigate to your profile settings and locate the "Email & Calendar" section
To access your personal profile, simply click your profile picture in the top right corner and select “Profile Settings.” From there, choose the “Email & Calendar” tab to integrate your Gmail or Outlook.
2. Click on the "Click to Connect" button to initiate the integration process
A popup will appear giving you the option to integrate either Outlook or a Google Workspace/Gmail account. Simply choose the appropriate option, and then you will be prompted to enter the login credentials for the email account you wish to connect.
3. Choose from the available options to select your preferred calendar sync method
Once your email is successfully connected, you will have three options for email calendar sync:
- Bi-Directional Sync: Enables synchronization between your CRM and calendar, allowing updates to flow both ways.
- One-Way Calendar Sync (CRM to Calendar Only): Syncs events from your CRM to your calendar, ensuring your calendar reflects your CRM activities.
- One-Way Calendar Sync (Calendar to CRM Only): Syncs events from your calendar to your CRM, capturing calendar activities within your CRM system.
Choose the sync option that best suits your needs and preferences.
How does the calendar integration work?
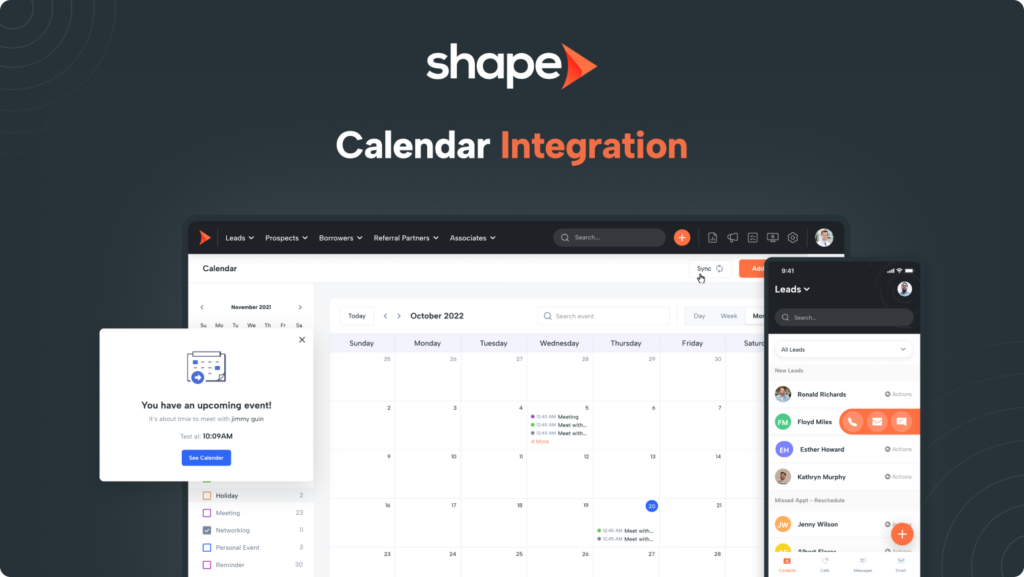
The Shape/calendar integration facilitates the creation and synchronization of calendar events between your connected calendar and the Shape calendar.
Shape performs a query on your calendar every 15 minutes, so please allow for this sync cycle if you don’t see an event instantly.
Synchronizing your connected calendar manually
If required, you can choose to manually initiate a synchronization process in Shape by following these steps:
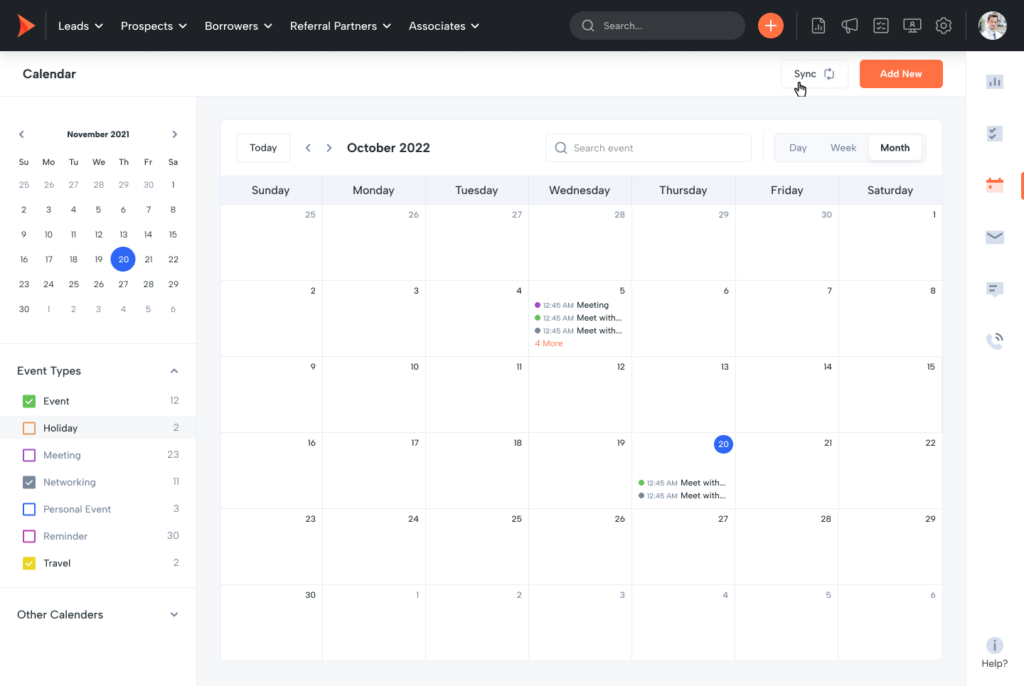
1. Click on the calendar icon located on the right-hand sidebar to access the calendar page. 2. On the calendar page, you’ll find the “Sync” button located in the upper right-hand corner. 3. Simply click the “Sync” button to initiate the synchronization process and ensure the latest updates are reflected.
This straightforward process allows you to take control of syncing your calendar in Shape effortlessly.

Note: It's important to be aware that pressing the "Sync" button may trigger API limits on Google or Outlook. Both platforms impose a limit of 10,000 requests per 10-minute period.
Email Forwarding
Out of the box, Shape will send and track outgoing emails. However, you also have the option to have your emails forwarded into Shape as well. You can set this up with simple email forwarding from within your email ISP. Only emails received by your connected email will forward into the system. It is also important to note that only emails received in your connected email, with a matching email address in Shape, will be forwarded. Emails unrelated to the contacts in your CRM will not be forwarded.
By default, Shape is designed to send and track outgoing emails seamlessly. However, if you prefer to also have your incoming emails integrated within Shape as well, you have the flexibility to enable email forwarding. This can be easily accomplished through your email using a straightforward email forwarding setup.
With email forwarding configured, Shape will capture and incorporate your inbound emails, ensuring a comprehensive and centralized email management experience.
Enabling incoming emails
To enable email forwarding, please request your system administrator to activate the "Shared Email Inbox" feature in the Billing & Transactions settings page under the "Add Ons" section. This step is necessary because incoming emails are included in the count of your 5,000 free emails and subsequent email usage within the system. It's important to understand that while Shape only captures and retains incoming emails that have a corresponding contact record in the system. This means that any promotional emails forwarded to Shape will be considered as part of your incoming email processing, even though they are not stored in the system if they don't match a contact's email address.
Setting up email forwarding to Shape
Setting up email forwarding to capture inbound emails is a simple process. Your incoming emails will not only be stored in the email inbox, conveniently located on the right-hand sidebar under the ‘inbox’ icon, but they will also be associated with the corresponding contact record based on matching email addresses.
1. Navigate to Settings>Billing & Transactions to enable email forwarding
You will first need to enable email forwarding in your system from the Billing & Transactions settings page linked below.
Scroll down on Billing & Transactions to find the section titled “Add On Features” and toggle ON “Shared Email Inbox.”
Billing & Transactions:https://secure.setshape.com/billing-transactions
2. Find your email forwarding address in your user profile
Once your email inbox is activated, you can find your unique email forwarding address in your user profile’s ‘Email & Calendar’ tab. Simply copy this address and proceed to set up email forwarding.
3. Set up email forwarding in your external email account
Setting up email forwarding can vary depending on your email provider. In your external email account settings, look for a section labeled ‘Email forwarding’ or a similar option. If you’re unable to locate this section in your email settings, we recommend contacting your email provider for further guidance.
After setting up a forwarding address, you will often receive an email containing a verification code. Locate this email within your email inbox by clicking on the ‘inbox’ icon situated on the right-hand sidebar in Shape.
3. Start receiving incoming emails
After the setup is finished, you can access the forwarded emails in your Shape system by clicking on the ‘Inbox’ icon. Furthermore, incoming emails can also be found in the ‘Contact Log’ tab within the respective contact record.
Enabling your Own SMTP Server
You can enable your own SMTP email credentials in the "API Integrations" settings page. This will allow you to bypass Shape's compliant sending servers and use your own. Please note that when doing this, email reporting and tracking native to Shape will not be supported as you're using your own, external sending servers where emails will be tracked.
Frequently asked questions
I am seeing the following error "connected email is not responding"
This can be due to the following reasons:
- A username and password reset
- An email service provider outage
- An expired API token
- A change in your email settings that affects APIs
The fix for this is simply disconnecting your integrated email and re-connecting.
My emails are not delivering when sending them through Shape
If you’re experiencing issues with email delivery when sending through Shape, there could be several factors at play. One common reason is incorrect configuration of the DMARC settings within Shape. It’s crucial to ensure that the DMARC settings align with your email provider’s requirements to ensure successful email delivery. Additionally, other potential causes could include spam filters, recipient email server issues, or incorrect email addresses. It’s recommended to review your email settings in Shape, verify the recipient addresses, and consider reaching out to Shape support for further assistance in troubleshooting the delivery problem.
How do I track emails sent from Shape?
Outgoing emails from your system are meticulously recorded and can be accessed within each contact record through the “Contact Log” tab. Here, you’ll discover a comprehensive overview of all the tracking statistics associated with the emails you’ve sent.
Furthermore, if you prefer to view all your sent emails in a centralized location, you can conveniently access the outgoing email report at: secure.setshape.com/email-report.
This comprehensive report provides valuable insights into key metrics such as the success or failure of emails, open rates, click-through rates, bounce rates, and the total number of unsubscribes. It’s an excellent resource for assessing the performance and engagement of your email communications.
I connected my email but nothing incoming emails are not coming through.
There are a couple of reasons this could be. Most commonly, it is due to not connecting email forwarding properly in your email but it is also important to note that while Shape only captures and retains incoming emails that have a corresponding contact record in the system. This means that any promotional emails forwarded to Shape will be considered as part of your incoming email processing, even though they are not stored in the system if they don’t match a contact’s email address.

