Table of Contents
Support Guide
How to Use Shape's Customer Portal
-
Shape Software

Adding Shape's Customer Portal
Kick start your relationships on the right foot with a white-labeled portal that showcases your company’s brand and reinforces the value you provide. Please reach out to your Account Representative or support@setshape.com to enable the Portal for your system.
Customizing Shape's Customer Portal
Once Shape’s customer portal has been added for you, and your users have been activated, start configuring the settings to your needs. Shape’s customer portal is pre-configured to industry standards, but each company has its own preferences. From the “Manage Customer Portal” settings page, you can easily alter the application, needs lists, custom questions, necessary fields, and more.
White label Shape's portal with your company logo & colors
Using the “Manage Customer Portal” settings tab, upload your logo file. For the best look, use a high-quality.png file type with background transparency. You can also update the sidebar color and text to match your branding.
Manage Customer Portal: https://secure.setshape.com/manage-customer-portal
Note: If you need to add additional portal footer content for legal reasons, you can navigate to the “Company Settings” page where you can add up to 2,500 characters of footer content.
Create custom document needs lists
In the “Manage Customer Portal” settings page, you can easily add needs list document requests that are either for standard upload, or for eSignature. Add the documents at the top of the page, and create unlimited needs lists below.
Adding Custom Questions
Shape gives you the ability to add custom questions for those situations that fit outside of the norm. Since we can’t add these custom questions to the 3.2 file, we save the responses in the customer’s “Portal” tab within their record!
Define required fields
If there are specific questions that you do not want a customer to be able to get past without filling in, Shape gives you the ability to make any questions in the portal application mandatory to be filled out before moving on.
Find users' sharable links & co-branded partner links
Once the customer portal is enabled, your users will see a new “Portal” tab within the contact details pages to easily send applications via email or text, approve and decline documents, and more. Additionally, your users will get a new portal link in their user profile to add to email signatures, on your website, etc. to capture new lead applications, and gather needs list documents.
1. Company-wide portal link
Share the white labeled portal URL that you created when you set up the customer portal on your website. When a new consumer registers for an account, the company-wide link instantly generates new leads in the system. The newly produced lead will be checked through duplicate management rules as well as distribution rules to assign to the appropriate user.
2. Individual user portal links
Each user who has been granted portal access will receive an individual portal URL that they can share. By clicking on their profile photo in the upper right hand corner of the screen in the navigation bar, they can access this link in their user profile settings. Under the “Personal Information” page, you’ll find a connection to the portal. To generate business, most users will include this URL in their email signature. Leads will assign to the particular user attached to the portal link as they sign up for the portal.
3. Co-branded portal links with partners
Any record that you add under the Referral Partner record type will receive a Co-Branded Link for both branding with your business as well as a link for each portal user on your system!
These can be found within the “Portal” tab within the Referral Partners record. Below is a direct link to learn more about the Partner Portal and Co-Branding with your partners!
Customer Portal for Referral Partners: https://setshape.com/support-guides/mortgage-pos-for-referral-partners-associates
Reviewing and Adjusting Portal Automation
Shape comes out of the box with automation set to notify the user, as well as the customer, for updates regarding their application! We recommend reviewing these triggers to make sure that they work for your company’s needs and make any needed adjustments.
Using your Customer Facing Portal
Your customers will be routed to the registration page to create an account. If customers go straight to your portal URL without being invited to the CRM, as soon as a new account is created, a new record will be added to your CRM. By default, these new accounts are created in the contact type defined in the Marketing Sources settings page. If the customer goes to the user’s direct link it will show their profile picture with their profile information and assign them automatically in Shape.
Note: If your customer has already created an account, they can click the “Log In” button in the upper right hand corner.
1.
Once signed up, your customers will follow the questions and milestones through the application
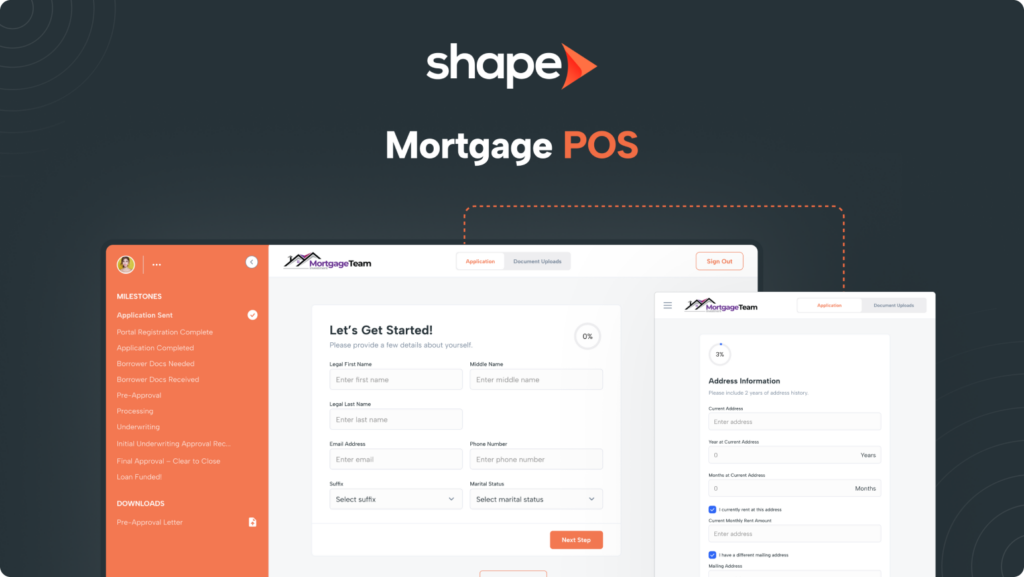
The milestones show on the left hand side and gives them access to fill out the application and upload documents through the easy to navigate POS. A percentage of completion will be given to them in the top right hand corner as they fill out the application.
2.
Customers fill out an interview style step by step questionnaire that dynamically changes based on their needs
For example, if they indicate that they have been at their current address for less than 2 years the portal will automatically ask for their previous residence. They can also add an additional address if needed. The information they fill in each section immediately syncs into the CRM upon your customers pressing the “Next” button, allowing you to see what has been completed within the CRM and what information is still needed.
3.
At any time, your customers can upload their documents via the “Document Uploads”
Documents are listed based on the document set that was selected. You can add and remove documents based on portal answers via “Manage Automated actions”
Manage Automated Actions: https://secure.setshape.com/triggers
4.
Send the portal invitation by pressing “Send Portal Invite” and send via email or text message (SMS)
You can also copy the portal link and send it manually in another method if desired. The portal link from within the lead details pages are connected to the lead’s CRM ID and will pre-populate information already pre-filled in your CRM.
After enabling portal users, you should be able to open a contact in your system and see a new “Portal” tab.
Note: If you need to request a custom one-off document that is unique to the specific application, use the “Add Custom Doc” button at the bottom of the needs list area. Add the document type and a description that appears in your customer’s portal.
Approving, Denying, and Requesting New Documents
Customers can easily upload and view the status of their documents in the document center. These uploaded documents automatically come through to the “Portal” tab for users within the CRM to view, review and either approve or decline. Portal documents are automatically converted to PDF and maintain the original file size (they do not convert to standard 8.5 x 11” sizing)
- A yellow icon indicates a newly uploaded document in need of review
- Press the "..." to preview the document in a new tab, download, or delete a document
- Press the red icon to decline the document
- Press the green icon to approve the document
Note: If a document is declined, it’s clear to the customer in the document center in the document area and list below that the document was not accepted along with your reason for the rejection.
Frequently asked questions
Can I restore deleted documents?
The milestones show on the left hand side and gives them access to fill out the application and upload documents through the easy to navigate POS. A percentage of completion will be given to them in the top right hand corner as they fill out the application.
Does Shape capture first party consent details for applications submitted through the portal?
Yes it does! Shape will capture first party consent details for applications submitted through your portal URL. Below is a list of fields for first party consent:
- Entry ID
- Entry Date
- User IP
- Source URL
- Channel
- Opt In Method
- Opt In Time
Can I ask custom questions in the application?
Yes! These are set in Settings > Manage Customer Portal. The custom questions will appear at the end of the application and the answers will populate in their record within Shape.
Can I download multiple documents at once?
Yes! Beneath the documents, you will find the “Download ZIP” button to download all documents to a ZIP file.
Do my documents automatically sync to LendingPad?
Yes! When you approve documents with the bi-directional LendingPad sync, your documents will automatically transfer to LendingPad!
My customer forgot their password and cannot reset it.
Don’t worry! You can reset your customers password from directly within their record! You will find this at the bottom of the Portal tab.
I have a customer that submitted documents to the portal but I cannot see them.
This is most commonly due to user error on the part of the customer. However please submit a ticket to support@setshape.com and our dedicated support team will be happy to take a look at the logs for that record and find those docs!
Can I download all of the documents at once or only one at a time?
On the Portal Tab within a record, you will find the “Download Zip” button which will download all of that record’s documents into a zip file.
Where do I update the logos on my customer portal?
The logo across your entire customer portal (in the top left) is managed from the Manage Customer Portal settings page. The logo on the left-hand side of the landing page will pull from the assigned user’s profile or the company settings page if using the general company link.
Can I change the questions in the application?
You can remove the existing questions and re-order how the fields appear, however, the questions themselves are not currently customizable.
Keywords: POS, Point of Sale, Integrations, Document Collection, Customer Application, Portal, Needs List, Approve Documents, Decline Document, Client Portal, Manage Customer Portal

